Posts

Finished!...almost

Image
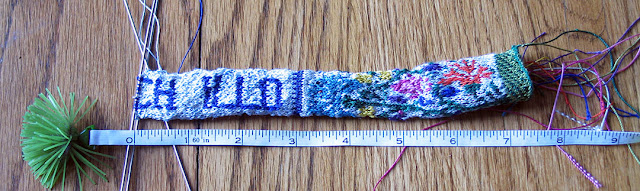
 Yes! I finally finished my Stitchillo project. I managed to finish the binding before the holiday, much to my relief. The caps of the spine are goatskin leather, and the leather paring gods were not with me for this the first time around. The second time went smoother.  I started by backing the knitting with paste and a thin sheet of Japanese paper.  Next I constructed the spine with pieces of 20pt. library board. I wanted the knitting to be at least flush with the leather or slightly recessed.  Here we are the second time around. The leather at the tail of the spine is darker because it is still wet from paste.  In the middle of all this I had to chase Jacques out of the paper drawer. My fault of course for leaving it open, as you can clearly see by those eyes - total innocence even though the rest of the photo else is blurry. Finally the spine is ready for boards.  In order to both hide the edges of the knitting and make the shoulders work, I had to dou

Knitting Finished

Image
 The knitting is finished. And I can't tell if I skipped a row on the second "T" or just pulled the stitches too tight for them to come back out in the blocking. At this point though, I'm going to live with it. The next step is to add the Uppercase Magazine symbol where it belongs. This was way too small to knit into the pattern so I decided to embroider it. The black is a satin stitch which went smoothly. The Uppercase U with arrow - not so smoothly. I lost count after pulling it out after 5 tries. You wouldn't believe how hard it is to stitch a straight line and not get a "v" at the bottom of your "u". I also cheated a little with the steeking. Since the edges are going to be hidden under the boards they don't have to look good. I'm terrified of this unraveling so I put a good bit of PVA right where I was going to cut it. It worked! Then I went to make the case and found that the knitting is not wide enough. I need 5cm to reac

Endbands

Image
 I love sewing end bands. They are quiet meditative work. There is great satisfaction in watching the silk settle over the core directly next to the previous loop. The content of the book inspired me to add a crazy little touch...  seed pearls. The pearls are at most 2mm wide. The pearls are sewn on using gold sewing machine thread. This is actually what the silk I used to knit with is used for. 

Third time's the charm

Image
Do you know that feeling? That awful feeling when you realize, you are not as on track as you thought you were? That's where I was last Wednesday morning. I already knew by the "C" that the flower section was too long and I would probably have to pick it off and just use the title. The spine of the book is only 8.25" long and at the "C' the spine already measured in at 7 inches. No way was I going to be able to squeeze the S-T-I-T into an inch and a quarter, never mind the bee motif at the top of the design.  But I persisted... And then, on Wednesday morning, with a strong cup of coffee under my fingers, and the "S" knitted snugger,  I realized that the quality of the knitting was not acceptable. It was far to loose and no matter how well I blocked it, I was never going to get the piece to look as good as it would if had I knitted all of it better. I took a break and ran the last minute Thanksgiving Day errands in hopes that I wasn&#

Waltzing Along

Image
Two steps forward and one step backward just about sums up how this project is going.  It is taking about 15 minutes to knit the 40 stitches of each round. That means I've been getting four rows (just about 3/8") finished per episode of season 6 of Longmire. That's not exactly scooting along. In addition, last week I had to rip back two inches of work because the gauge had changed, and then on Friday I had to rip back another five rows because I had dropped a stitch and hadn't noticed. HOW did I not notice!? At any rate, as of Saturday, I'm done with the most difficult bit. The flowers at the bottom and I have no idea about how they will block out. The letters are going more smoothly, especially since there are only three colors to manage. I'm brainstorming how to make adjustments if necessary. I'm also concerned about the length. I only need about 8.5 inches of the spine, but I'm already at 5.5. Maybe during blocking the hight will shrink

Hurdles

Image
I spent many many hours last week, including most of the weekend (and two Harry Potter books-on-tape at least) just designing the pattern. The artists in the book I'm binding, make designing a pattern sound so easy! Just pixels and grids and colors - no biggy! I guess that is always the mark of the professional, they make it seem like a breeze. I did finally settle on a design that I like. There are some things about it I wish I could change, but at some point you have to fish or cut bait. Time to fish. After three attempts I was finally able to get an acceptable cast-on. And a few hours later I had a very nice base. Then on to the flowers (three colors at once). This could very well be the most difficult thing I have ever or will ever knit in my life. However.... It doesn't look like the gauge is correct. I added what I thought were enough stitches to compensate for the wider spine, but I started feeling that it just didn't look big enough. I decided to sleep o

Progress

Image
  One of the earliest decisions I made about this project was how I was going to actually bind it. The best way to construct a case incorporating the knitting on the spine is with a binding I learned from Todd Pattison - organizer of this project. This is an easy leather spine binding. Above are two of the books I made in class. The structure is brilliant and hides a lot of problems.  The cover is constructed so that the boards allow you tuck the spine covering underneath them.  Voila! When I took the workshop I made a sample of the structure for reference as well as note taking. Because the knitting will be so much thicker than pared leather I have to put a filler board under the covering board to keep things even.  For my teensy little knitting    I made a weensy little text block. Rounded it, and constructed the case. My idea of putting a filler board in place worked very well. I used thin mat board instead of book binder's board.